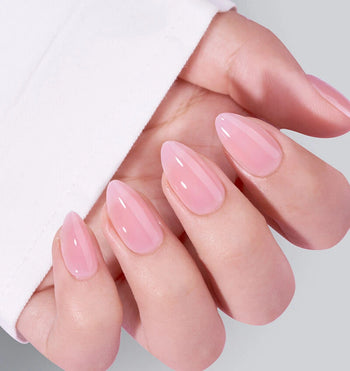
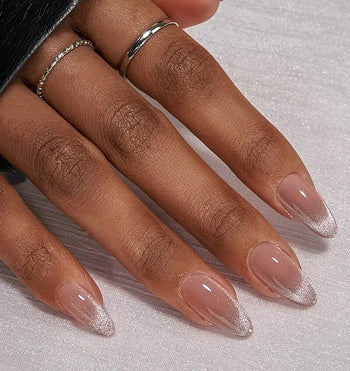
When it comes to getting the perfect set of nails, choosing between builder gel vs polygel is important. With many options available, it can be hard to decide which one is right for you. In this guide, we will compare two popular nail enhancement products: builder gel and polygel.
Builder gel and polygel are both types of gel nails used to create long-lasting, durable nails. They are applied in similar ways, but there are key differences between them. By understanding these differences, you can make an informed choice about which product suits you best.
In the following sections, we will provide a detailed comparison of builder gel vs polygel. We will cover the pros and cons of each product, their application process, durability, flexibility, and more. Whether you're a beginner or an experienced nail technician, this guide will help you choose the right nail enhancement product for your needs.
Table of contents
What Is Builder Gel?
If you're looking for a sturdy, long-lasting nail enhancement, builder gel might be just what you need. Builder gel is a type of gel nail enhancement that has been around for a long time. It is a thick, viscous gel that is applied to the nails with a brush and cured under a UV lamp, just like polygel.
Builder gel is primarily used to create nail extensions, overlay natural nails for added strength, or mend nail damage. It is a hard gel that is nonporous and has to be filed off. Builder gel can either be soft gel or semi-hard gel or hard gel.
Benefits of Builder Gel
One of the benefits of builder gel is that it provides strength, length, and shape to the natural nails for three-plus weeks of wear. It can be used to create a natural-looking nail or a more dramatic look, depending on your preferences.
Builder gel is also quite flexible, which makes it easier to sculpt on your nails. However, the greater flexibility of builder gel can make it more challenging to create a perfectly smooth surface.
How to use Builder Gel?
To use builder gel, you will need to apply a gel base coat to your nails first. This will help the builder gel adhere to your nails and create a strong bond. You can then apply the builder gel in thin layers and cure it under a UV lamp. Once the builder gel has cured, you can apply gel nail polish on top to create a beautiful, long-lasting manicure.
In summary, builder gel is a versatile and durable type of gel nail enhancement that provides strength, length, and shape to natural nails. It is a hard gel that can be used to create nail extensions, overlay natural nails, or mend nail damage. It is also quite flexible, making it easier to sculpt on your nails. If you're looking for a long-lasting, natural-looking manicure, builder gel might be the perfect choice for you.
What Is Polygel?
Polygel is a type of hybrid gel that combines the best properties of both acrylic and gel products. It is a lightweight and flexible material that is easy to apply and shape, making it a popular choice for nail technicians and DIY enthusiasts alike.
Polygel is composed of a unique formula that includes a mixture of acrylic powder and polymer gel. This combination allows it to cure under a UV lamp, just like traditional gel products. However, unlike regular gels, polygel does not run or sag during application, making it easier to work with.
Benefits of Polygel
One of the key benefits of polygel is its strength. It is a durable material that can withstand daily wear and tear, making it a great option for those who want long-lasting nail enhancements. Additionally, polygel is less damaging to the natural nail than other types of nail enhancements, such as acrylics.
Polygel nail kits are widely available and come with all the necessary tools and materials needed to create beautiful and long-lasting nail enhancements at home. These kits typically include polygel, a base coat, a top coat, a UV lamp, and other accessories.
Polygel is a unique and innovative product that provides the best of both worlds when it comes to nail enhancements. Its flexible and lightweight properties make it easy to work with, while its strength and durability ensure long-lasting results.
Whether you're a professional nail technician or a DIY enthusiast, polygel is definitely worth considering for your next nail enhancement project.
Builder Gel vs. Polygel: Application Process

When it comes to the application process, builder gel, and polygel have some notable differences. Here's a step-by-step guide to applying each type of nail enhancement:
How to Apply Builder Gel?
- Start by preparing your nails. File and buff them to remove any oils and create a smooth surface for the gel to adhere to.
- Apply a base coat of gel and cure it under a UV or LED lamp according to the manufacturer's instructions.
- Take a small amount of builder gel on your brush and apply it to your nail, starting at the base and working your way towards the tip. Be sure to apply it evenly and avoid getting it on your skin or cuticles.
- Cure the first layer of gel under the lamp.
- Repeat steps 3 and 4 until you achieve the desired thickness and shape.
- Finish with a top coat of gel and cure it under the lamp.
How to Apply Polygel?
- Start by preparing your nails. File and buff them to remove any oils and create a smooth surface for the polygel to adhere to.
- Apply a base coat of gel and cure it under a UV or LED lamp according to the manufacturer's instructions.
- Squeeze a small amount of polygel onto the nail or dual form.
- Use a brush and slip solution to spread the polygel evenly over the nail, starting at the base and working your way towards the tip. Be sure to apply it evenly and avoid getting it on your skin or cuticles.
- Cure the polygel under the lamp according to the manufacturer's instructions.
- Remove the dual form or shape the polygel on your nail with a file.
- Finish with a top coat of gel and cure it under the lamp.
The application process for builder gel and polygel is similar, but there are some differences in the technique and tools required.
Builder gel requires more precision and multiple layers to achieve the desired thickness, while polygel can be applied in one sweep. Polygel also requires slip solution and a dual form or nail for shaping, while builder gel can be applied directly to the nail.
Builder Gel vs. Polygel: Durability and Strength
When it comes to nail enhancements, durability and strength are two important factors to consider. Builder gel and polygel are two popular options, but which one is more suitable for different nail types and lifestyles?
Durability of Builder Gel
Builder gel is known for its durability. It is a thick, viscous gel that is cured under a UV lamp to create a hard, sturdy nail enhancement. Builder gel is an excellent option for those who want a long-lasting nail enhancement that can withstand daily wear and tear.
However, it's important to note that the durability of builder gel can vary depending on the brand and application technique. If not applied properly, builder gel can chip or break, which can be frustrating for those who are looking for long-lasting nail enhancement.
Polygel Strength
Polygel is a hybrid product that combines the qualities of both acrylic and gel. It typically consists of a combination of acrylic powder and gel. Polygel is often odorless and does not require a primer. It is also known for its strength and flexibility.
Polygel is a great option for those who want a natural-looking nail enhancement that is strong and flexible. It's also a good option for those who have thin or weak nails, as it can help strengthen and protect them.
Which One is More Suitable?
When choosing between builder gel and polygel, consider your individual needs and preferences. If you want a long-lasting nail enhancement that can withstand daily wear and tear, builder gel may be the better option for you. However, if you want a natural-looking nail enhancement that is strong and flexible, polygel may be the better option.
It's also important to consider your lifestyle. If you work with your hands a lot or engage in activities that may be hard on your nails, builder gel may be the better option. However, if you lead a more active lifestyle or prefer a more natural-looking nail enhancement, polygel may be the better option.
Builder Gel vs. Polygel: Flexibility and Versatility

When it comes to nail enhancements, both builder gel and polygel have their unique features.
Builder gel is known for its flexibility, making it ideal for creating various nail shapes and designs. It is a thick, viscous gel that can be applied easily with a brush. Builder gel is cured under a UV lamp, and it provides a sturdy, long-lasting enhancement.
Polygel , on the other hand, is a more versatile option. It is a combination of acrylic and gel, which makes it easier to work with. Polygel is lightweight and flexible, which makes it ideal for creating natural-looking nails. It is also easy to mold and shape, making it perfect for creating intricate designs.
When it comes to creating various nail shapes and designs, both builder gel and polygel have their advantages. Builder gel is more flexible, which makes it easier to create curved or rounded nails. Polygel, on the other hand, is more versatile, which makes it easier to create intricate designs and patterns.
Removal Process: Builder Gel vs. Polygel
Removing builder gel and polygel can be a bit different, and it's important to follow the correct procedure to avoid damaging your natural nails. Here are the steps you should follow for each type of nail enhancement:
Builder Gel Removal Process:
- Buff the top layer of the builder gel with a nail file to break the seal and remove the shine.
- Soak a cotton ball in acetone and place it on top of the nail.
- Wrap the fingertip with aluminum foil to hold the cotton ball in place.
- Leave the cotton ball and aluminum foil on for 10-15 minutes.
- Remove the aluminum foil and cotton ball, and gently scrape off the builder gel with a cuticle pusher.
- Buff and file the nails to remove any remaining residue.
It's important to note that builder gel should only be removed by a professional nail technician. Attempting to remove it yourself can lead to damage to your natural nails.
Polygel Removal Process:
- Buff the top layer of the polygel with a nail file to break the seal and remove the shine.
- Soak a cotton ball in acetone and place it on top of the nail.
- Wrap the fingertip with aluminum foil to hold the cotton ball in place.
- Leave the cotton ball and aluminum foil on for 10-15 minutes.
- Gently remove the aluminum foil and cotton ball, and use a cuticle pusher to gently scrape off the polygel.
- Buff and file the nails to remove any remaining residue.
Polygel is generally easier to remove than builder gel, and it can be removed at home with a bit of care. However, make sure to avoid picking or pulling at the polygel, as this can damage your natural nails.
Pros and Cons: Builder Gel vs. Polygel
When it comes to nail enhancements, both builder gel and polygel have their pros and cons. Here is a side-by-side comparison table to help you understand the differences:
|
Builder Gel |
Polygel |
|
|
Composition |
Thick, viscous gel |
Hybrid product combining acrylic powder and gel |
|
Application |
Applied with a brush |
Applied with a dual-ended tool |
|
Curing |
Cured under a UV lamp |
Cured under an LED bulb or UV lamp |
|
Advantages |
Sturdy and long-lasting |
More flexible and easier to apply |
|
Disadvantages |
More brittle and difficult to work with, prone to cracking and chipping |
Can be more expensive |
Builder gel is a tried and true method for nail enhancements. It is a thick, viscous gel that is applied to the nails with a brush and cured under a UV lamp. One of its main advantages is that it is sturdy and long-lasting. However, it can be more brittle and difficult to work with, especially for beginners. It can also be more prone to cracking and chipping.
On the other hand, polygel is a newer product that combines the qualities of both acrylic and gel. It is often odorless and can be applied with a dual-ended tool. Polygel is more flexible and has a smoother texture, making it easier to apply and producing a more natural look. However, it can be more expensive than builder gel.
Conclusion
Now that you've read about the differences between builder gel and polygel, you should have a better idea of which option suits you. Consider your needs and preferences when choosing a gel for your nails.
For long-lasting and sturdy nails, builder gel is a reliable choice. It's been trusted by many for years. If you want a product that combines the best of acrylic and gel, polygel might be the better option.
Consult with a nail technician for personalized advice. They can help you choose the best option for your nails.
For more on nail care and maintenance, explore other BTArtbox nail care guides. Check out product pages for Builder Gel to find your perfect fit.
Frequently Asked Questions
What are the main differences between builder gel and polygel?
Builder gel and polygel are both types of nail enhancements, but they differ in their composition and application. Builder gel is a thick, viscous gel that is applied to the nails with a brush and cured under a UV lamp. Polygel, on the other hand, is a hybrid between acrylic and gel that is applied using a dual-ended tool and cured under an LED or UV lamp. Polygel is also more flexible than builder gel.
What's better, polygel or builder gel?
The answer to this question depends on your personal preference and the specific needs of your nails. Both builder gel and polygel offer different benefits. Builder gel is a great option if you want a sturdy, long-lasting nail enhancement, while polygel is a good choice if you want a lightweight, flexible nail enhancement that is easy to apply.
Is polygel better than hard gel?
Polygel and hard gel are both popular nail enhancement options, but they have different characteristics. Polygel is a hybrid between acrylic and gel that is more flexible than hard gel. Hard gel is a thicker gel that is cured under a UV lamp and provides a sturdier, more durable nail enhancement. The choice between polygel and hard gel depends on your personal preference and the specific needs of your nails.
Is builder gel good for your nails?
Builder gel is generally safe for your nails if it is applied and removed correctly. However, like all nail enhancements, it can cause damage to your nails if it is not applied or removed properly. It is important to have a trained and experienced nail technician apply and remove your builder gel to minimize the risk of damage.
What is the difference between builder gel and acrylic gel?
Builder gel and acrylic gel are both types of nail enhancements, but they differ in their composition and application. Builder gel is a thick, viscous gel that is applied to the nails with a brush and cured under a UV lamp. Acrylic gel, on the other hand, is a mixture of liquid and powder that is applied to the nails using a brush and cured through a chemical reaction. Acrylic gel is generally harder and more durable than builder gel.
What lasts longer, acrylic or builder gel?
Both acrylic and builder gel can last for several weeks with proper application and care. However, the longevity of your nail enhancement depends on various factors, such as your nail health, lifestyle, and daily activities. It is important to follow proper nail care and maintenance routines to ensure the longevity of your nail enhancement.
