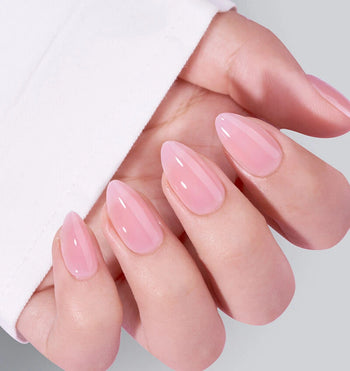
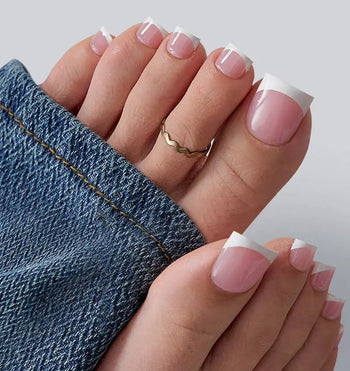
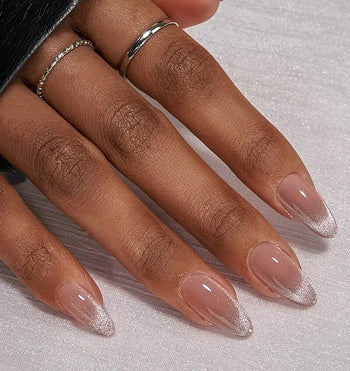
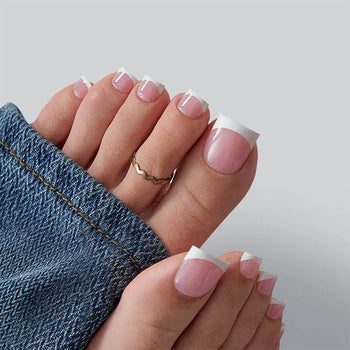
Blooming gel nail designs are taking the nail art world by storm! This magical product creates stunning, artistic effects that look complex but are surprisingly easy to achieve.
Whether you're a nail art beginner or a seasoned pro, blooming gel opens up a whole new world of creative possibilities for your manicures.
Ready to transform your nail game with gorgeous, flowing designs that will turn heads? Keep reading to discover everything you need to know about creating eye-catching blooming gel nail art!
What is Blooming Gel and Why It's Trending?
Blooming gel is a special nail product that creates a watercolor-like effect when gel polish is dropped into it. The magic happens because blooming gel prevents colors from setting immediately, allowing them to spread, blend, and "bloom" into beautiful patterns.
The popularity of blooming gel has exploded on social media platforms like Instagram and TikTok. Nail artists and enthusiasts love it because it creates professional-looking designs without requiring advanced skills. With minimal tools and some practice, anyone can create salon-worthy nail art at home.
Blooming gel designs stand out because they create unique, highly individualized patterns that are difficult to exactly replicate. Each nail becomes its own tiny masterpiece, perfect for those who want to express their creativity through their manicure.
Essential Tools and Products for Blooming Gel Nail Designs
To create stunning blooming gel nail designs, you'll need a few basic supplies:
- Blooming gel (the star of the show!)
- Gel polishes in your favorite colors
- UV/LED lamp for curing
- Base and top coat
- Fine detail brush for adding colors
- Cleanup brush for edges
- Alcohol wipes
- Nail file and buffer
For the best results, colors that contrast well with each other work magnificently with blooming gel. Think black and white, bright neons against pastels, or deep blues with soft pinks. The greater the contrast, the more your blooming effect will pop!
Before starting, always check your specific blooming gel manufacturer's instructions, as application techniques may vary slightly between brands.
Ready to try blooming gel designs? Check out our spring gel nail collection for the perfect seasonal colors to create your own blooming masterpieces!
10+ Trending Blooming Gel Nail Designs to Try Now
1. Simple Flower Blooming Gel Nail Art for Beginners
Create delicate flower patterns by dropping pink and white gel polish dots into your blooming gel. Use a thin brush to drag through the center of each dot to create petal shapes – perfect for spring!
2. Watercolor-Inspired Blooming Gel Designs
Drop soft pastel colors close together in blooming gel and watch them merge into dreamy watercolor patterns. This design looks complex but requires minimal skill – just add colors and let the blooming gel work its magic.
3. Marble Effect Using Blooming Gel Techniques
Achieve luxury marble nails by dropping white, gray, and black polish into blooming gel. Use a toothpick to swirl slightly for authentic marble veining that looks like you spent hours at the salon.
4. Abstract Blooming Gel Patterns
Short nails shine with bold abstract designs! Drop tiny dots of bright colors into your blooming gel and use a dotting tool to create swirls and lines for one-of-a-kind abstract art.
5. Spring Floral Blooming Gel Nail Art Ideas
Celebrate spring with blooming gel flowers in pastel colors. Create small flower centers with yellow dots, then add petal colors around them and watch them bloom into a garden on your fingertips.
6. Summer-Inspired Vibrant Blooming Gel Patterns
Capture summer vibes with neon colors that pop against a white base. Drop orange, pink, and yellow gel polish into blooming gel for sunset-inspired patterns that scream vacation-ready!
7. Fall and Winter Blooming Gel Color Combinations
Embrace cozy seasons with deep burgundy, forest green, and gold blooming gel designs. These rich colors create sophisticated patterns perfect for holiday parties and winter events.
8. Holiday-Themed Blooming Gel Nail Designs
Make your nails festive with holiday colors in blooming gel patterns. Try red and green for Christmas, orange and black for Halloween, or pastels for Easter – the possibilities are endless!
9. Celebrity Red Carpet Blooming Gel Nail Inspiration
Channel your inner celebrity with glamorous blooming gel designs seen on the red carpet. Think metallic gold blooming into deep navy or silver spreading through rich burgundy for star-worthy nails.
10. Instagram-Famous Blooming Gel Nail Art Trends
Stay on trend with designs that are blowing up on social media, like colorful blooms on a clear base or negative space designs where the blooming effect creates beautiful frames around bare nail.
11. Professional Nail Artist Techniques with Blooming Gel
Take your skills to the next level with advanced techniques like layering multiple blooming gel effects or creating precise patterns using strategic color placement and timing.
12. Minimalist Blooming Gel Designs for Everyday Wear
Keep it simple but stunning with subtle blooming effects in neutral tones. A soft pink blooming into beige creates an elegant, office-appropriate look that still showcases your nail art skills.
Looking for more floral inspiration? Explore our flower nail designs gallery for beautiful blooming gel ideas that bring nature to your fingertips!
Step-by-Step Guide to Creating Basic Blooming Gel Nail Designs
Creating beautiful blooming gel nail designs is easier than you might think! Follow these steps for perfect results every time:
- Prep your nails properly: file, buff, and push back cuticles for a smooth surface.
- Apply base coat and cure under your UV/LED lamp.
- Apply a thin layer of your base color (usually a light shade) and cure completely.
- Apply a layer of blooming gel (don't cure yet!).
- Working quickly, drop small dots of your chosen gel polish colors into the wet blooming gel.
- Watch the magic happen as colors spread and create beautiful patterns!
- Once you're happy with the design, cure under your lamp.
- Seal with top coat and cure for a glossy, long-lasting finish.
The most common mistake beginners make is using too much color. Remember that a little goes a long way with blooming gel – start with tiny dots and add more if needed!
Want to create accent nails with blooming gel? Check out our accent nail ideas for creative ways to make statement nails that perfectly complement your blooming gel designs!
Advanced Blooming Gel Techniques and Design Tutorials
Once you've mastered the basics, try these advanced techniques to take your blooming gel nail art to the next level:
Double-Layered Blooming Gel Effects
Create depth by applying a second layer of blooming gel over your first design after curing. Add different colors to create a multi-dimensional effect that looks almost 3D!
Incorporating Glitter with Blooming Gel Designs
Mix fine glitter into your gel polish before dropping it into blooming gel for sparkly, eye-catching designs. The glitter will follow the blooming pattern for a magical effect.
3D Effects Using Blooming Gel
Build dimension by adding tiny blobs of clear builder gel on top of your blooming design, then cure for raised elements that catch the light beautifully.
Gradient Techniques with Blooming Gel
Create stunning gradients by strategically placing colors that blend well together. The blooming effect naturally creates soft transitions between shades.
How to Make Your Blooming Gel Nail Designs Last Longer
Your beautiful blooming gel nail art deserves to last! Follow these tips to extend the life of your manicure:
- Apply a high-quality, thick top coat and make sure to cap the free edge of your nails to prevent chipping
- Consider applying two layers of top coat for extra protection
- Wear gloves when doing dishes or cleaning to avoid exposing your nails to harsh chemicals
- Use cuticle oil daily to keep your nails and surrounding skin hydrated
- Avoid using your nails as tools to open packages or cans
If you notice your blooming gel design starting to fade or chip, you can refresh it by carefully applying another layer of top coat. For minor chips, you can use a matching color to touch up the area before applying top coat.
Try our hand-soft gel press-ons for long-lasting blooming gel designs that resist chipping and maintain their beautiful bloom effect for weeks!
Conclusion
Blooming gel nail designs offer endless creative possibilities that are now easier than ever to achieve.
BTArtbox Nails press-on nail products feature stunning blooming gel effects that give you instant artistic manicures without the learning curve.
Want salon-quality blooming gel designs without the DIY hassle? Shop BTArtbox's press-on nail collection today and bloom your nail game in minutes!
Frequently Asked Questions
What is the difference between blooming gel and regular gel?
Regular gel polish sets and cures without changing shape or spreading. Blooming gel has a special formula that stays wet longer and causes colors to spread and create patterns before curing. Blooming gel acts as a medium for design creation rather than a color itself. Regular gel maintains its exact placement until cured. Blooming gel has a thicker consistency designed specifically for artistic effects.
What does blooming gel nail do?
Blooming gel creates beautiful, watercolor-like effects when gel polish is dropped into it. It causes colors to spread out organically into unique patterns before being cured under a UV/LED lamp. It prevents colors from setting immediately. It allows for blending and diffusion of different shades. It creates one-of-a-kind designs that can't be precisely duplicated.
Can you do ombre nails with blooming gel?
Yes, blooming gel works wonderfully for creating ombre effects! Apply blooming gel, then drop two colors that blend well together where you want them to meet. The blooming effect creates a watercolor-style blend rather than the smooth gradient typical of traditional ombre techniques. For best results, choose colors that are adjacent on the color wheel. You can control the intensity by adjusting how much color you drop in.
Which is better for nails, gel or regular?
Both have pros and cons depending on your needs. Gel polish lasts longer (2-3 weeks) without chipping and provides a glossier finish. Regular polish is easier to remove without professional help and doesn't require UV exposure. Gel polish is more durable and resistant to chipping than regular polish. Regular polish allows for quick color changes without damaging nails. Be aware that some people may experience allergic reactions to gel products. Proper application and removal are key for nail health with both types.
Related articles:
Acrylic Flower Nail Designs: Tips and Ideas for a Fresh Look
