


Hai mai desiderato avere una nail art da salone senza passare ore o spendere un sacco di soldi? Con lo stamping per unghie, puoi creare disegni straordinari direttamente a casa, anche se non hai mai fatto nail art prima!
I timbri per unghie rendono facile essere creativi e mostrare il tuo stile unico in pochi semplici passaggi. Che tu voglia fiori carini, motivi cool o look stagionali di tendenza, lo stamping è un modo divertente per far risaltare le tue unghie.
Curiosa di sapere come funziona? Continua a leggere per scoprire come usare i timbri per unghie, ottenere consigli per risultati impeccabili e trovare ispirazione per la tua prossima manicure!
Perché lo Stamping per Unghie è una Rivoluzione per la Nail Art
Se ami le unghie creative ma trovi difficile dipingere a mano i disegni, lo stamping per unghie sta per diventare il tuo nuovo trucco preferito. Questa tecnica facile permette a chiunque di ottenere nail art dettagliata e dall’aspetto professionale in pochi minuti.
Lo stamping per unghie è ottimo sia per principianti che per esperti. Fa risparmiare tempo, ha un aspetto fantastico e ti permette di provare nuovi disegni ogni volta che vuoi. Se ami le unghie creative, lo stamping è una tecnica da provare assolutamente.
Cosa Ti Serve: Strumenti e Materiali per lo Stamping delle Unghie
Prima di iniziare, è importante avere gli strumenti giusti per lo stamping delle unghie. Avere tutto pronto rende il processo semplice e aiuta i tuoi disegni a venire perfetti.
- ✔️ Timbro per Unghie: Lo strumento che raccoglie e trasferisce il disegno.
- ✔️ Piastre per Stamping: Piastre metalliche con motivi o forme incise.
- ✔️ Raschietto: Uno strumento piatto per rimuovere lo smalto in eccesso dalla piastra.
- ✔️ Smalto per Unghie: Lo smalto speciale per stamping funziona meglio, ma alcuni smalti normali possono andare bene se sono spessi, opachi e molto pigmentati.
- ✔️ Base Coat e Top Coat: Per proteggere le unghie e far durare di più la tua nail art.
-
✔️ Opzionale: Una barriera in lattice o del nastro per proteggere la pelle, e un piccolo pennello per la pulizia.
Se il tuo timbro è nuovo e non raccoglie i disegni, leviga delicatamente la superficie con una lima per unghie o lavalo con acqua e sapone per rimuovere eventuali residui di fabbricazione.
💅Non dimenticare di dai un’occhiata a queste idee di nail art per compleanni per più ispirazione su cosa puoi creare con i tuoi timbri per unghie!
Come Usare i Timbri per Unghie: Passo Dopo Passo per Risultati Perfetti
Imparare a usare i timbri per unghie è facile se segui ogni passaggio. Ecco una guida semplice per aiutarti a ottenere disegni impeccabili ogni volta.
✨ Prepara le Tue Unghie per lo Stamping
Inizia con unghie pulite e asciutte. Modellale con una lima per unghie e spingi delicatamente indietro le tue cuticole. Applica una base protettiva per le unghie, poi aggiungi il tuo colore base preferito. Lascia asciugare completamente prima di procedere. Questo è molto importante per ottenere disegni nitidi!
✨ Scegli e Prepara la Tua Piastra per Stamping
Scegli un disegno che ti piace dalla tua piastra di stampa. Pulisci la piastra con solvente per smalto per assicurarti che sia pulita e priva di oli o residui di smalto. Questo aiuta a ottenere un disegno nitido e chiaro.
✨ Applica lo Smalto sulla Piastra di Stampa
Applica una quantità generosa di smalto sul disegno che vuoi usare. Non è necessario coprire tutta la piastra, solo il motivo che stai stampando.
✨ Rimuovi lo Smalto in Eccesso
Tieni la spatola a 45 gradi e passala delicatamente sul disegno. Questo rimuove lo smalto in eccesso lasciando solo quello inciso nel motivo.
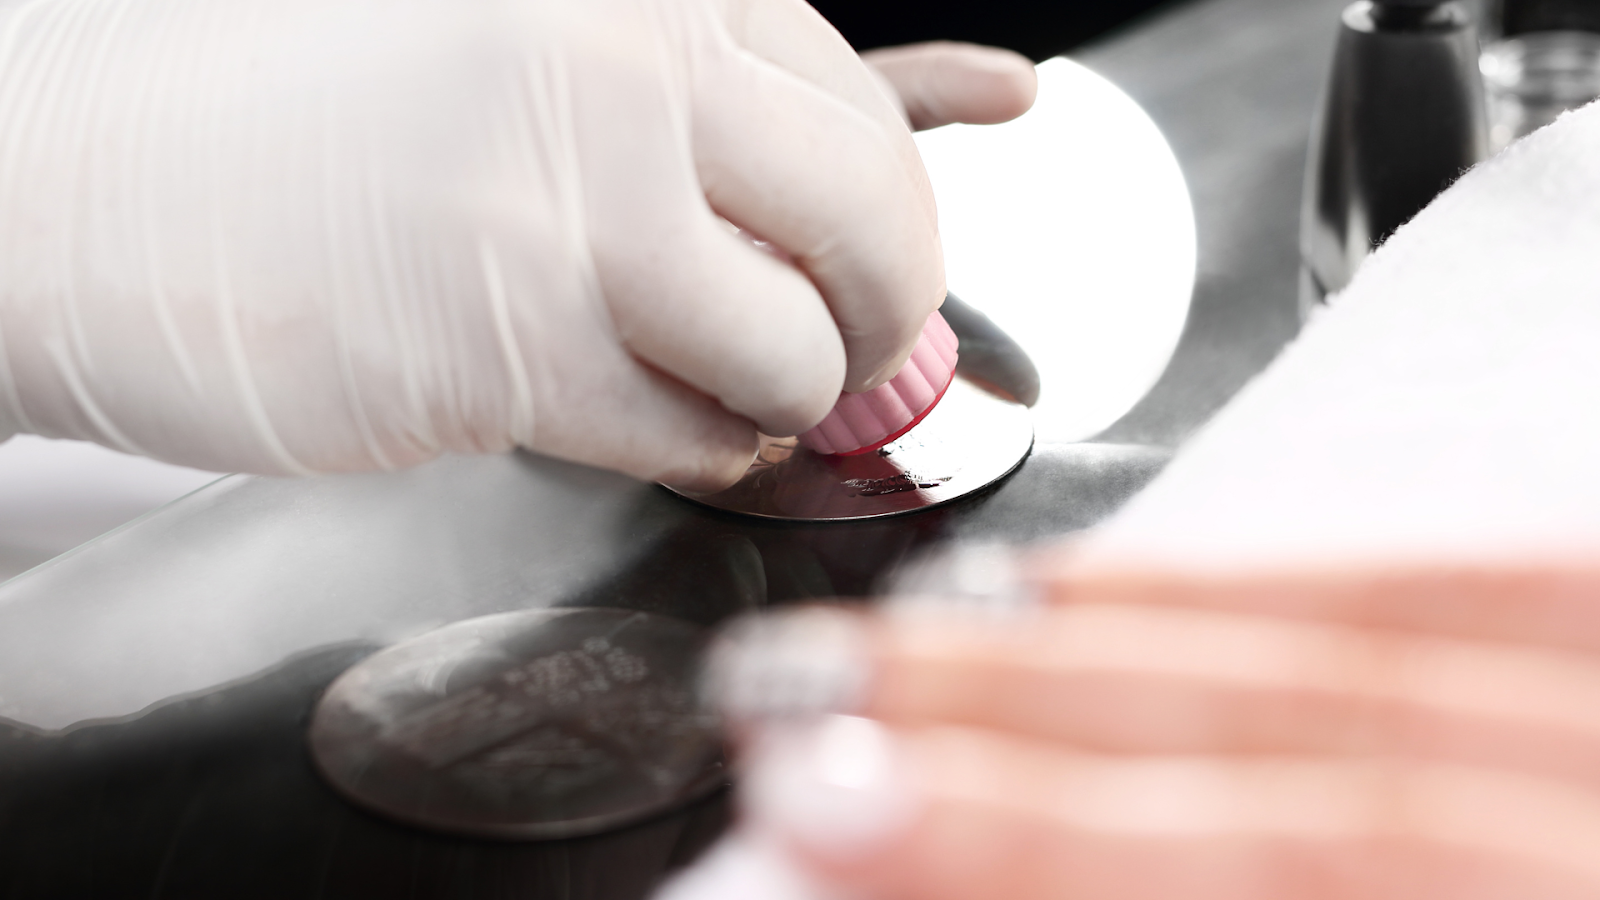
✨ Raccogli il Disegno con il Timbo
Premi o rotola rapidamente il timbro sul disegno. Il motivo dovrebbe aderire al timbro. Se non succede, prova a pulire il timbro e la piastra, o lavora un po’ più velocemente così lo smalto non si asciuga.
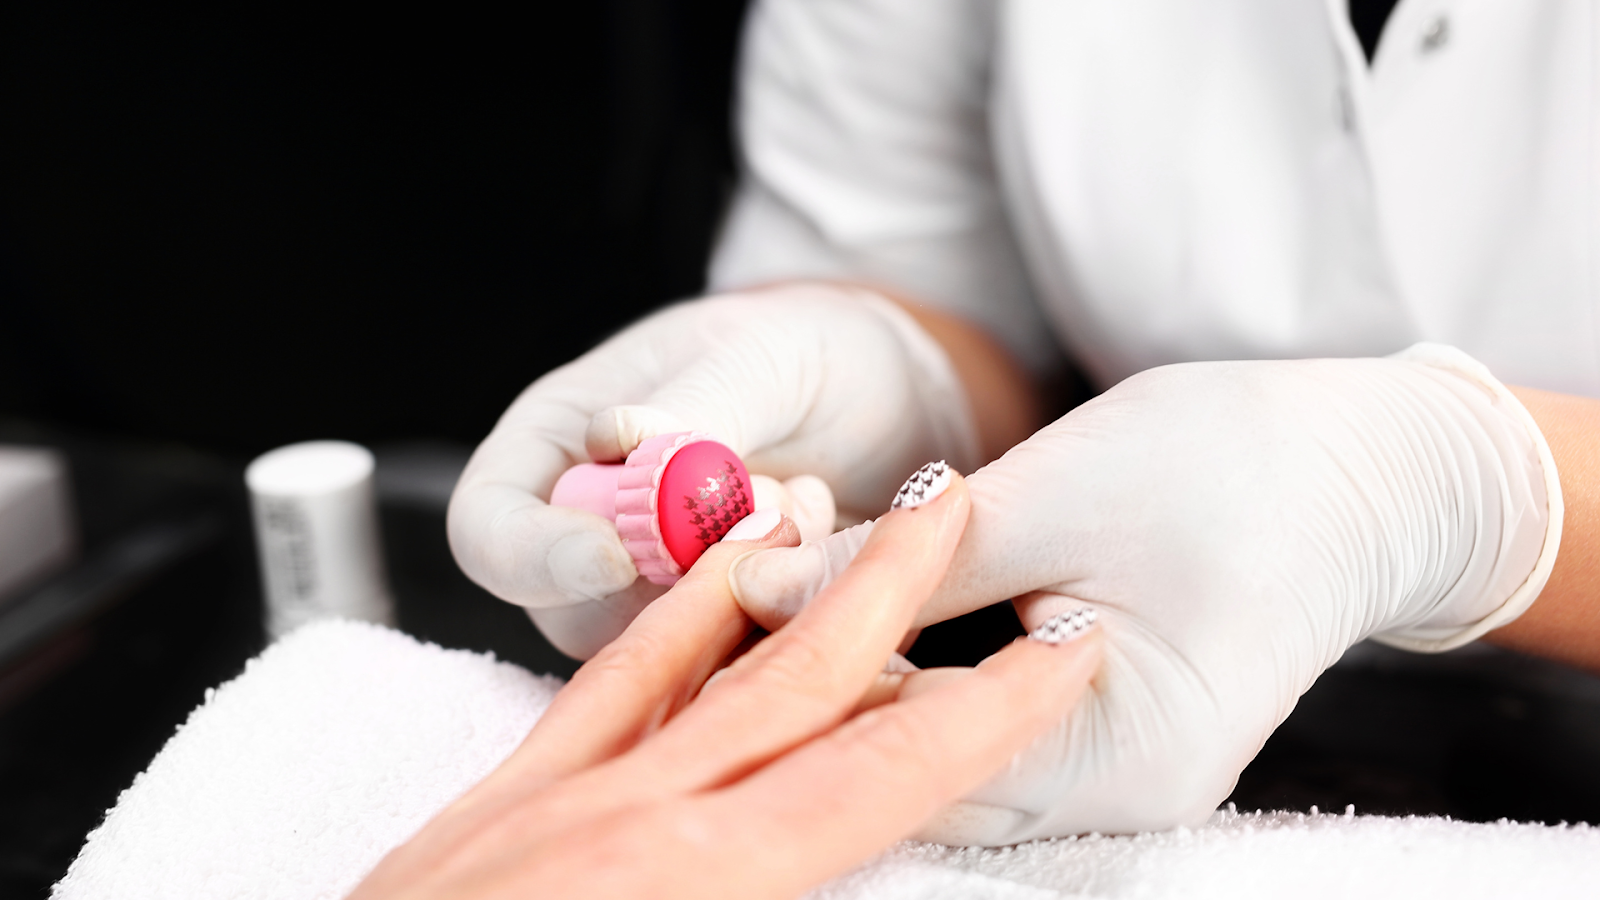
✨ Trasferisci il Disegno sull’Unghia
Allinea il timbro con l’unghia e rotolalo o premilo delicatamente per trasferire il disegno. Cerca di farlo in un unico movimento fluido per i migliori risultati.
✨ Pulisci e Sigilla la tua Nail Art
Usa un pennello e solvente per smalto per pulire eventuali eccessi di smalto dalla pelle. Una volta asciutto, applica un top coat per sigillare il disegno e farlo brillare.
Per risultati ottimali, stendi il top coat sul disegno senza premere troppo per evitare sbavature.
💅Vuoi altre idee creative? Non dimenticare di dare un’occhiata a questi divertenti design unghie rosa e bianchi per il tuo prossimo progetto di stampa!
Risoluzione dei problemi: Perché la mia stampa per unghie non funziona?
A volte, anche seguendo tutti i passaggi, le cose non vanno come previsto. Ecco alcuni problemi comuni e cosa puoi fare per risolverli.
- Il timbro non raccoglie il disegno: Assicurati che la piastra e il timbro siano puliti. Prova a usare un po’ più di smalto o a raschiare più delicatamente.
- Il disegno appare sfocato o incompleto: Lavora velocemente così lo smalto non si asciuga prima della stampa. Assicurati di premere o rotolare il timbro in modo uniforme.
- La stampa non si trasferisce sull’unghia: Il colore di base potrebbe essere troppo bagnato o troppo asciutto. Prova a stampare su unghie appena asciutte al tatto.
💅Ami gli stili retrò? Scopri altri look fantastici con questi Design unghie anni '90 old school per la tua prossima avventura di stampa!
Consigli da Pro per il Successo nella Stampa Unghie
Vuoi portare la tua stampa per unghie al livello successivo? Questi semplici consigli ti aiuteranno a ottenere risultati ancora migliori e a far risaltare i tuoi disegni.
- ✔️Stratificazione: Prova a stampare più di un colore per un effetto stratificato interessante. Lascia asciugare ogni strato prima di aggiungere il successivo.
- ✔️ Glitter e Foil: Dopo la stampa, aggiungi glitter o foil per un tocco extra di brillantezza.
- ✔️ Cura degli Strumenti: Pulisci il tuo timbro e le piastre dopo ogni uso con solvente per smalto per mantenerli perfetti.
- ✔️ Pratica: Non preoccuparti se i primi tentativi non sono perfetti. La stampa per unghie diventa più facile e divertente con la pratica.
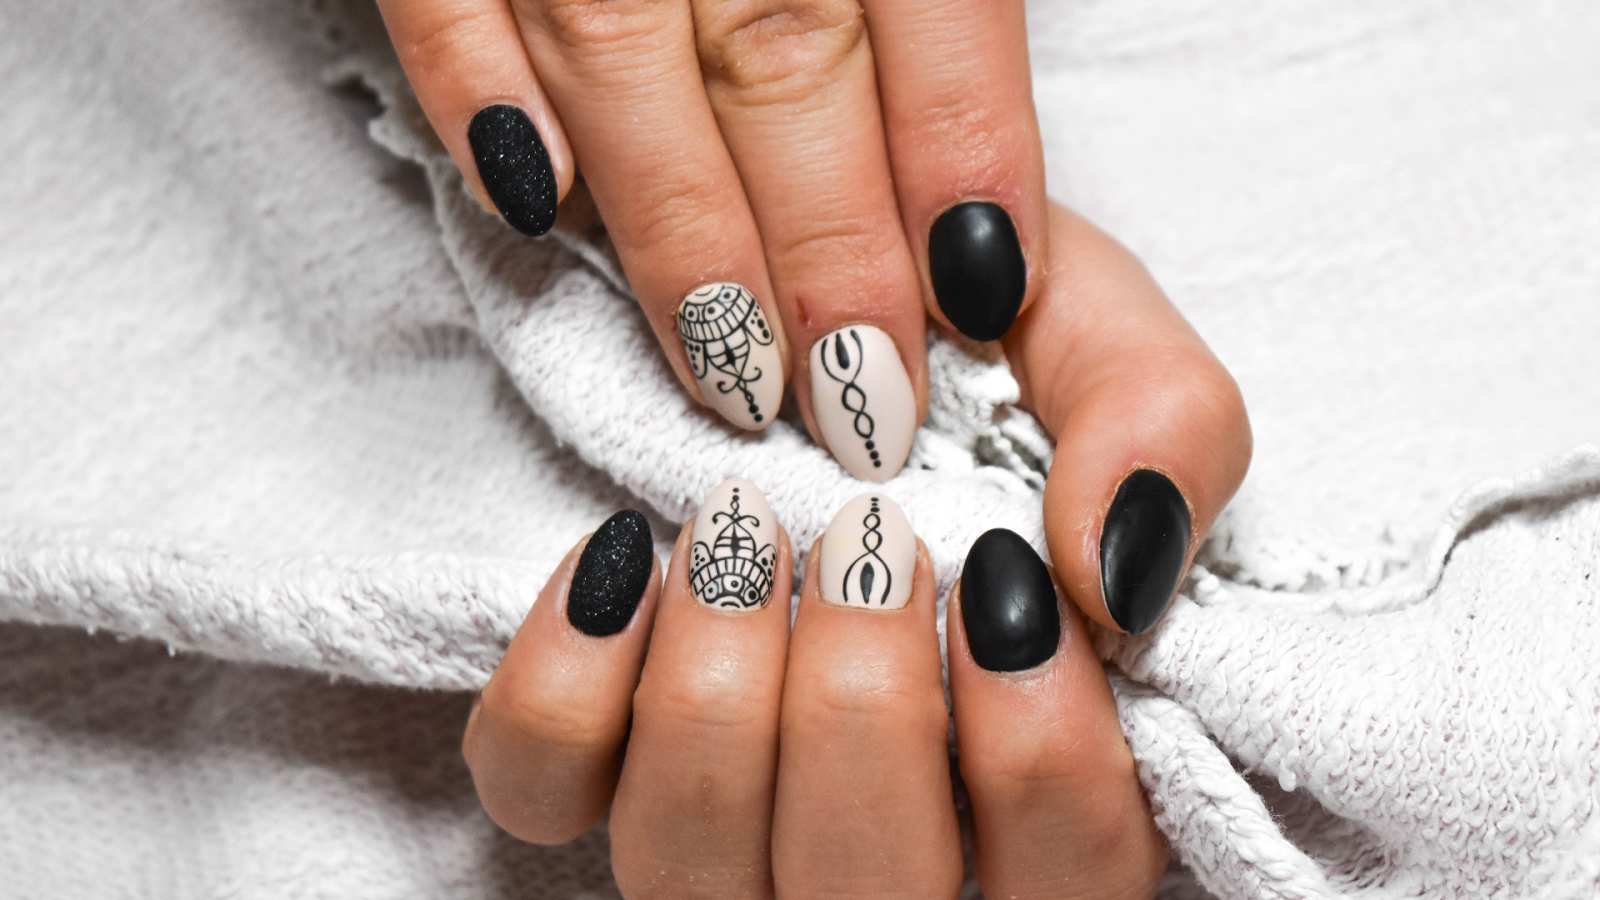
Idee Creative: Divertenti Disegni per Timbri da Provare
Ci sono tantissimi modi per essere creativi con la stampa per unghie. Ecco alcune idee per ispirare la tua prossima manicure e aiutarti a provare qualcosa di nuovo.
- ✔️ Disegni Stagionali: Prova fiocchi di neve per l'inverno, fiori per la primavera o zucche per l'autunno.
- ✔️ Mix and Match: Usa motivi diversi su ogni unghia o combina due disegni su un'unghia per un look unico.
- ✔️ Unghie Accentate: Timbra solo una o due unghie per mano per un accento di stile.
Lascia libera la tua immaginazione. Non esiste un modo sbagliato di stampare!
Conclusione
Ora sai come usare i timbri per unghie come un professionista! Con pochi strumenti e un po' di pratica, puoi creare nail art sorprendenti direttamente a casa. Non aver paura di sperimentare nuovi disegni, colori e prova anche le unghie press-on per un cambio di stile veloce.
Puoi usare la stampa per unghie su unghie naturali, unghie press-on e anche tips in gel morbido come XCOATTIPS per infinite possibilità creative.
Se vuoi ancora più guide, consigli e ispirazioni per nail art, assicurati di visitare BTArtbox. Hanno tantissimi tutorial utili e le ultime tendenze nella nail art, inclusi gli XCOATTIPS per un look da salone a casa.
Pronta a migliorare la tua manicure? Sfoglia BTArtbox per altre idee creative, esplora i loro unghie press-on e XCOATTIPS, e inizia a mostrare il tuo stile unico oggi stesso!
Domande Frequenti
Gli adesivi per unghie si applicano su unghie bagnate o asciutte?
Gli adesivi per unghie devono sempre essere applicati su unghie asciutte. Se le unghie sono bagnate o appiccicose, gli adesivi non aderiranno correttamente e potrebbero scivolare. Assicurati che il colore di base sia completamente asciutto prima di applicare gli adesivi per ottenere i migliori risultati.
I timbri per unghie funzionano con lo smalto normale?
Alcuni smalti normali funzionano per la stampa, soprattutto se sono densi e molto pigmentati. Tuttavia, gli smalti speciali per stamping sono fatti per essere più spessi e opachi, il che di solito garantisce disegni più nitidi e definiti. Se usi uno smalto normale, testalo prima per vedere se funziona bene con il tuo timbro e la tua piastra.
Come usare gli adesivi per unghie per principianti?
Inizia assicurandoti che le unghie siano pulite e asciutte. Stacca con cura l'adesivo dal supporto e posizionalo sull'unghia, premendo delicatamente per eliminare eventuali bolle. Termina con uno strato di top coat per sigillare l'adesivo e farlo durare più a lungo.
Come addensare lo smalto per la stampa?
Se il tuo smalto è troppo liquido per la stampa, prova a lasciare la bottiglia aperta per qualche minuto per far evaporare un po' del solvente, il che può renderlo più denso. Puoi anche conservarlo in un luogo fresco, poiché il calore può rendere lo smalto più fluido. Fai solo attenzione a non farlo seccare completamente.
In alternativa, puoi usare un addensante commerciale per smalto per ottenere la giusta consistenza per la stampa.


