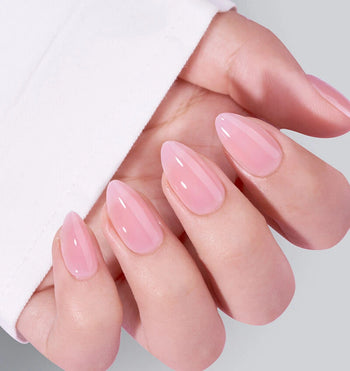
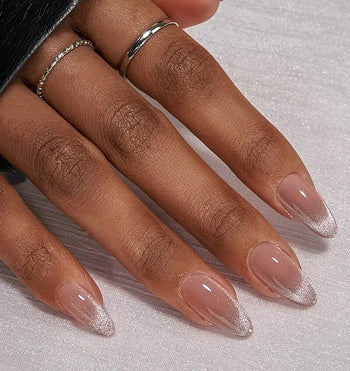
Acrylic flower nail designs are the latest obsession in the nail art scene, injecting a dash of nature's charm into your everyday style. Whether it's minimalist petal outlines or full-blown floral masterpieces, these designs offer the perfect blend of sophistication and playfulness. Every brushstroke brings a touch of the outdoors to your fingertips, creating a bespoke bouquet that's tailored to your personal aesthetic. In a world where customization is key, floral acrylics are the go-to for a manicure that's anything but garden-variety.
This blog is your go-to source for mastering acrylic flower nail designs, packed with top tips and fresh ideas to help you nail the look. It doesn't matter if you're a pro with a polish brush or just starting to dabble in DIY nail art; these designs are all about making a statement that's as individual as you are. So, let’s dive into the floral trend that's blossoming on hands everywhere and learn how to elevate your nail game with the natural beauty and creativity of flower-inspired designs.
What Are Acrylic Nails?
Acrylic nails are a type of artificial nails that are made of a combination of liquid and powder. They are applied on top of your natural nails to give them a longer and more elegant appearance. Acrylic nails are a popular choice among people who want to enhance the look of their nails.
Types of Acrylic Nails
There are two types of acrylic nails: tips and sculpted. Tips are pre-made nail extensions that are glued onto the natural nails. Sculpted nails, on the other hand, are created by applying a mixture of liquid and powder directly onto the natural nails. Sculpted nails are more durable and long-lasting than tips.
Benefits of Acrylic Nails
Acrylic nails offer several benefits. They are strong and durable, making them perfect for people who have weak or brittle nails. They are also easy to maintain and can be customized to suit your style. Acrylic nails can be painted with any color or design, making them a versatile option for any occasion.
One of the main benefits of acrylic nails is that they can protect your natural nails from damage. They act as a barrier between your nails and the environment, preventing them from breaking or chipping. Acrylic nails are also resistant to water, which means that you can go swimming or take a shower without worrying about damaging your nails.
In addition, acrylic nails can be used to cover up any imperfections or blemishes on your natural nails. They can also be used to lengthen your nails if you have short nails or if you want a more dramatic look.
Designing Acrylic Flower Nails
Acrylic flower nails are a beautiful and elegant way to add a touch of style to your nails. They are perfect for any occasion and can be customized to match your outfit or mood. In this section, we will go over the tools needed, choosing colors and patterns, and the step-by-step application process.
Tools Needed for Acrylic Flower Nails
Before you start designing your acrylic flower nails, you will need to gather a few tools. Here are the essential tools you will need:
- Acrylic powder and liquid
- Nail brush
- Nail tips
- Nail file
- Nail glue
- Topcoat
- Dotting tool
- Tweezers
- Nail stickers or nail art accessories (optional)
Make sure to have all these tools on hand before you start designing your acrylic flower nails.
Choosing Colors and Patterns
When it comes to choosing colors and patterns for your acrylic flower nails, the possibilities are endless. You can choose from a wide range of colors and patterns to match your outfit or mood. Some popular colors for acrylic flower nails are pink, red, yellow, and blue.
You can also add some extra flair to your acrylic flower nails by using nail stickers or nail art accessories. These can be used to create intricate designs or add some sparkle to your nails.
Step-by-Step Application Process
Now that you have all the tools and colors you need, it's time to start designing your acrylic flower nails. Here is the step-by-step application process:
-
Start by preparing your nails. Remove any old nail polish and file your nails to your desired shape.
-
Apply the nail tips using nail glue. Make sure they are securely in place.
-
Mix the acrylic powder and liquid according to the instructions on the packaging.
-
Using a nail brush, apply the acrylic mixture to your nails. Start at the base of the nail and work your way up.
-
Use a dotting tool to create the petals of your flowers. Dip the dotting tool into the acrylic mixture and create small dots on your nails. Use tweezers to manipulate the dots into petal shapes.
-
Repeat step 5 to create as many flowers as you like.
-
Allow the acrylic to dry completely.
-
Once the acrylic is dry, file your nails to your desired shape.
-
Apply a topcoat to your nails to seal in the design.
Flower Nail Design Variations

When it comes to acrylic flower nail designs, there are several variations to choose from. Here are some popular options to consider:
1. Floral French Tips
French tips are a classic nail design that never goes out of style. Adding a floral twist to this design can take it to the next level. You can choose to have the flowers on just one or two nails or have them on all your nails for a more cohesive look. This design is perfect for any occasion, from weddings to everyday wear.
2. 3D Flower Accents
Adding 3D flower accents to your acrylic nails can create a unique and eye-catching look. These flower accents can be made from acrylic or gel and can be shaped to resemble any flower you desire. This design is perfect for those who want to add a touch of glamour to their nails.
3. Floral Ombre
Ombre nails are a popular trend, and adding a floral design to this look can make it even more stunning. You can choose to have the flowers fade into the ombre or have them placed at the base of the nail for a more subtle look. This design is perfect for those who want to add a pop of color to their nails.
4. Floral Accent Nails
If you want to keep your nail design simple but still want to add a floral touch, consider having floral accent nails. You can choose to have the flowers on just one or two nails or have them on all your nails for a more cohesive look. This design is perfect for those who want a subtle yet elegant look.
Maintaining Your Nail Art
Aftercare Tips
Once you have your beautiful acrylic flower nail art, it's important to take care of it to ensure it lasts as long as possible. Here are some aftercare tips to keep in mind:
- Avoid harsh chemicals: Chemicals found in cleaning products, detergents, and even some nail polish removers can damage your acrylic nails and the nail art on them. Use gloves when cleaning and avoid exposing your nails to harsh chemicals.
- Moisturize: Keep your nails and cuticles moisturized to prevent them from becoming dry and brittle. Use a cuticle oil or hand lotion regularly to keep them healthy.
- Don't use your nails as tools: Your acrylic nails may look strong, but they are not indestructible. Avoid using them to open cans, peel off stickers, or perform other tasks that could damage them.
- Be gentle: Treat your acrylic nails and nail art gently. Avoid picking or pulling at the nail art, and don't use them to scratch or scrape at things.
Repairing Damaged Designs
Even with proper care, your acrylic flower nail art may become damaged over time. Here are some tips for repairing it:
- Fix small chips: If you notice a small chip in your nail art, you can try to fix it yourself. Use a toothpick or small brush to carefully fill in the missing area with acrylic paint or nail polish.
- Visit a professional: For more significant damage, it's best to visit a professional nail artist. They can repair the damage and touch up the nail art to make it look as good as new.
- Remove and start over: If the damage is too severe, you may need to remove the nail art and start over. This can be done at home using acetone and a nail file, or you can visit a professional to have it removed safely.
Conclusion
As we've journeyed through the enchanting world of acrylic flower nail designs, it's clear that these intricate patterns are much more than a fleeting trend—they're a celebration of personal style and an ode to the artistry of nail design. With each petal and hue, these designs have the power to transform your nails into a canvas of creativity and an expression of your own blossoming beauty.
Ready to let your nails bloom with the freshest flower designs of the season? Check out our vibrant collection at Fun Summer Nails for all the inspiration and tools you need to create your floral fantasy. From sunny daisies to exotic blossoms, your nails can be the perfect accessory to brighten up your look and spread joy with every wave. So go ahead, pick your favorite petals and let your nail art flourish!
Frequently Asked Questions
How can I create a simple acrylic flower design on my nails?
Creating a simple acrylic flower design on your nails is easy. You can start by painting a base coat of your desired color and then adding small dots of acrylic paint to create petals. You can also use a toothpick or a fine brush to create the petals. Once the petals are dry, you can add a small dot of contrasting color in the center of the flower to complete the design.
What techniques are used to make 3D flower designs on acrylic nails?
To create 3D flower designs on acrylic nails, you can use various techniques such as sculpting, molding, and layering. Sculpting involves using acrylic powder and liquid to create a three-dimensional flower shape. Molding involves using a mold to shape the acrylic into a flower design. Layering involves adding multiple layers of acrylic to create a 3D effect.
Are there easy-to-follow steps for beginners wanting to try acrylic flower nail art?
Yes, there are easy-to-follow steps for beginners wanting to try acrylic flower nail art. Start by painting a base coat of your desired color on your nails. Then, using a fine brush, create small dots of acrylic paint to create petals. Add a small dot of contrasting color in the center of the flower to complete the design. You can also use pre-made flower stickers or decals to create a simple and easy design.
What are some suitable acrylic flower nail designs for short nails?
For short nails, it's best to keep the design simple and minimalistic. You can try creating a small flower design on one or two nails or use a single flower decal on each nail. Another option is to create a French tip design with a small flower accent.
How can I achieve an elegant flower nail design using acrylics?
To achieve an elegant flower nail design using acrylics, you can try creating a white or pastel-colored base coat and then adding small, delicate flowers using a fine brush. You can also add glitter or rhinestones for an extra touch of elegance.
Can you suggest some ways to add a floral touch to simple acrylic nails?
One way to add a floral touch to simple acrylic nails is by using flower decals or stickers. You can also create a simple flower design using a fine brush and acrylic paint. Another option is to add a floral accent nail by using a different color or design on one nail.
