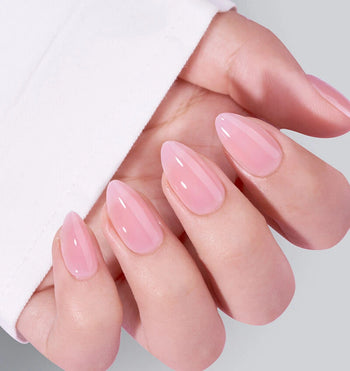
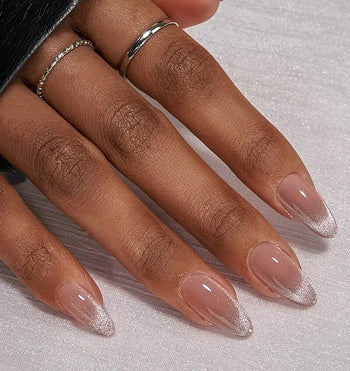
Snowflake nails are a must-have this winter, offering a stylish way to showcase your holiday spirit. These designs, featuring intricate snowflakes and frosty accents, bring elegance and charm to any occasion—whether it’s a festive party or a quiet evening by the fire.
The best part? You don’t need a salon to achieve them! With BTArtBox’s trendy press-ons, you can create flawless snowflake-inspired nails right at home. Simple to apply and beautifully designed, they make it easy to stay on-trend this season.
Ready to transform your nails into a winter wonderland? Keep reading to learn how you can rock snowflake nails effortlessly this season!
Why Choose Snowflake Nails This Winter?
Embrace Winter Vibes with Snowflake Nails
Snowflake nails are a stylish way to bring winter magic to your look. These designs add frosty and festive charm to your nails, perfect for celebrating the season. Just like real snowflakes, no two designs have to be the same!
Why Snowflake Nails Are a Winter Must-Have
- Festive Glam: Perfect for Christmas parties, New Year's events, or cozy nights by the fire.
- Versatile Styles: Choose from chic minimalist looks or bold, glittering patterns.
- Customizable: Mix snowflakes with glitter, stars, or frosty ombre for a unique set.
Design Ideas to Try

Classic Silver and White: Timeless elegance for any occasion.
Add shimmer to your snowflake nails with our Silver Press-On Nails. Perfect for a frosty, chic look!

Icy Blue Ombre: A dreamy, frosted effect.
Complete your snowflake nails with icy, wintery hues. Browse our Blue Holiday Nails collection for stunning designs that capture the magic of the season.

Glitter Accents: Add sparkle for extra holiday flair.
Enhance your snowflake nails with our White Glitter Nails. Add sparkle for a magical, winter-inspired look!
How To Do Your Snowflake Nails with Press-Ons
Press-on nails make it easy to achieve a beautiful snowflake design without a trip to the salon. You can transform your nails into winter wonders with a little creativity and the right tools.
How To Apply Press-On Nails (Step-by-Step Guide)
-
Gather Your Materials: Start with clean, dry nails. You'll need a nail file, buffer, rubbing alcohol or nail polish remover, and your press-on nails.
-
Prepare Your Natural Nails: Use the file to gently shape your natural nails. Buff the surface lightly to improve the bond. Clean them with rubbing alcohol to remove oils.
-
Select the Right Sizes: Match each press-on nail to your natural nail for the best fit. Adjust with a file if necessary.
-
Apply the Press-On Nails: Apply glue to either the press-on nail or your natural nail. Press down firmly for 10-15 seconds, ensuring no air bubbles. Repeat for all nails.
- Final Adjustments: Once adhered, file edges for a more natural look. Avoid water and excessive hand use for at least an hour.
Ensure your snowflake nails stay secure all season long. Check out our Fingernail Adhesives for a strong, lasting hold that keeps your manicure looking flawless.
How To Add Your Snowflake Nail Art
-
Choose Your Art Supplies: Select the necessary tools like thin brushes or nail stickers. Decide on the colors you want for your snowflake design.
-
Create Your Base: Apply a base coat of high-quality nail polish to your press-on nails. Let it dry completely.
-
Design Your Snowflakes: Use a fine brush dipped in white polish to create snowflakes. Consider using small dotting tools for added details. For beginners, stickers can simplify this step.
-
Seal Your Design: Let the art dry fully. Apply a clear topcoat to protect your snowflake design, adding shine and durability.
- Enjoy Your Festive Nails: Show off your art at holiday gatherings. Your snowflake designs will surely grab attention without needing professional help.
Take your snowflake nails to the next level with custom designs. Explore our Nail Art Kit for everything you need to create a unique, festive manicure at home.
Top Snowflake Nail Designs to Try
Embrace the magic of winter with stunning snowflake nails. These designs offer a variety of styles, from glittering beauties to bold colors, perfect for any occasion during the chilly season.
Glittery Snowflakes

Add a sparkle to your snowflake nails with a touch of glitter. Opt for a base color like navy or deep purple, and layer shimmering silver or gold glitter over it. You can place glitter on the nail tips or create a gradient effect.
Incorporate intricate snowflakes using a fine brush or nail art stickers. Glittery snowflakes are great for holiday parties and festive gatherings, making your nails stand out with a frosty elegance.
Matte Winter White

For a chic and understated look, try matte winter white nails. A soft matte finish gives a sophisticated edge to your winter look, perfect for both casual and formal settings. Pair these with delicate white snowflake designs to enhance the overall look.
You can also add texture by incorporating velvet or sweater patterns. This design captures the serene beauty of winter and is ideal for those who prefer a minimalist yet stylish approach to nail art.
Create a frosty, chic look with snowflake-inspired designs. Browse our White Holiday Nails collection to find the perfect base for your winter manicure.
Icy Ombre Snowflakes

Create a stunning effect with icy ombre snowflakes. Start with a light blue base that gradually fades into a deeper shade towards the tips. Add white snowflakes for contrast, giving the appearance of snow gently falling down.
This design works well when accented with silver tips or metallic nails, adding a touch of elegance. You can also use different shades of blue to evoke the chill of winter’s icy landscapes.
Complete your snowflake nail look with frosty blue designs. Explore our Blue Press-On Nails collection for chic, winter-inspired styles!
Bold Winter Colors

For a striking appearance, explore bold winter colors such as deep reds, emerald greens, or rich purples. Combine these with white or gold snowflake designs for a powerful contrast. Black snowflake nails on a vibrant base can be particularly striking.
Consider adding chrome or glitter accents to elevate the look. Bold winter colors are excellent for making a statement during the season, ensuring your nails capture attention and admiration.
Add a festive touch to your snowflake nails with rich green hues. Explore our Green Holiday Nails collection for stunning seasonal styles!
What Are The Benefits of Using Press-Ons for Nail Art?
Press-on nails are the easiest way to get stunning nail art without the hassle of a salon visit. They’re quick to apply, beginner-friendly, and perfect for anyone who loves switching up their manicure without committing to one design.
Quick and Convenient
Press-ons let you achieve a flawless manicure in minutes. Whether it’s for a last-minute event or just a mood boost, you can skip the salon and get professional-looking nails right at home.
Gentle on Your Nails
Unlike some salon techniques, press-ons protect your natural nails. They act as a shield, preventing damage and allowing your nails to grow underneath while still looking fabulous.
Budget-Friendly
Salon visits can add up quickly, but press-ons are a cost-effective alternative. You’ll save money while still enjoying the high-quality designs and finishes you’d expect from a professional manicure.
A Style for Every Mood
- Classic French tips? Check.
- Bold patterns? Got those too.
- Subtle, minimalist designs? Absolutely.
Press-ons come in endless designs, shapes, and sizes, so you can always find the perfect set to match your vibe.
Easy to Swap and Reuse
Changing your look is simple. You can switch designs for every occasion or outfit, making press-ons an ideal choice for anyone who loves variety. Many press-ons are even reusable, so you can get multiple wears out of one set with proper care.
Long-Lasting Durability
Modern press-ons are built to last. Many are chip-proof and waterproof, so your manicure stays intact and looking fresh for days.
Perfect for Beginners
No painting skills? No problem. Press-ons give you intricate nail art without needing steady hands or special tools. They’re a great way to explore creative designs effortlessly.
Press-on nails combine convenience, versatility, and style, making them a game-changer for anyone looking to elevate their nail game!
How To Achieve Long-Lasting Press-On Snowflake Nails
Press-on snowflake nails are not just a festive favorite—they’re also a quick and stylish way to upgrade your winter manicure.
The key to making them last? Proper prep and application. Follow these steps to enjoy your snowflake-inspired nails for days without worry.
1. Start with Clean Nails
- Wash your hands thoroughly to remove oil and dirt.
- Use a gentle nail polish remover to wipe away any residue, ensuring a clean base.
2. Nail Prep
- Lightly file the free edge of each nail in one direction to smooth them out.
- Carefully push back your cuticles to create a flat surface for better adhesion.
3. Size Matters
- Select press-on nails that fit closely to your natural nail size.
- If a press-on is too large, gently file the sides for a perfect fit. A proper fit ensures your nails adhere securely and stay in place.
4. Application
- Apply a thin layer of glue to both your natural nail and the back of the press-on.
- Hold each press-on nail in place for at least 30 seconds to form a strong bond.
5. Aftercare
- Avoid submerging your nails in water immediately after application.
- Wear gloves during chores to protect your nails.
- Use cuticle oil regularly to keep your nails and surrounding skin hydrated and healthy.
6. Extra Tips for Longevity
- Handle delicate tasks like typing or opening packages with care to prevent unnecessary strain.
- For acrylic nail users, similar prep and aftercare steps can help maintain long-lasting designs.
By following these steps, your press-on snowflake nails will stay secure, stylish, and festive all season long!
Achieve stunning snowflake nails in minutes. Shop our Christmas Press-On Nails collection for quick, salon-quality results!
Frequently Asked Questions about Snowflake Nails
How can I get the best snowflake nails?
Achieving the best snowflake nails is easy with BTArtBox’s press-on nail collection. Start by prepping your nails—clean them, push back cuticles, and choose the right size press-ons. Apply a thin layer of glue, press firmly for 30 seconds, and enjoy flawless, festive nails that look salon-perfect without the hassle!
How do I choose the right size for press-on nails?
To find the right size, measure the width of your natural nails. Most press-on nail kits come with several sizes. Choose one that covers your nail completely without overlapping onto your skin. Proper sizing ensures comfort and a natural look, whether you're sporting a snowflake design or classic French tips.
Are press-ons safe for natural nails?
Yes, press-on nails can be safe for your natural nails if applied and removed correctly. Use nail glue or adhesive tabs for the best results, and avoid picking or peeling them off, which could damage your nails.
Can I reuse snowflake press-on nails?
You can often reuse press-on nails, including snowflake designs, if they are properly removed and cleaned. Gently soak them in warm water and remove any glue residue to prepare them for another wear.
How can beginners create snowflake nail art at home?
For beginners, start with a simple base color, like a clear or soft blue. Use thin nail art brushes to paint snowflakes, or choose adhesive snowflake decals for an easy application. Incorporate 3D nail art for a more dynamic look.
What’s the best way to remove press-ons without damaging nails?
The safest way to remove press-ons is by soaking your nails in warm, soapy water for 10-15 minutes to loosen the adhesive. Gently lift the edges with an orange stick, avoiding excessive force. Once you remove them, moisturize your natural nails to keep them healthy.
